Snyk — Integration With Jenkins Pipeline
In this article, we will discuss about how we can configure Snyk security plugin with Jenkins pipeline.

SNYK is an open-source security platform for finding out vulnerabilities in the source code of an application. This works effectively with all languages and all types of applications as well.
Just like antivirus scans your device and finds out the threats, in the same way, it scans your source code and provides vulnerabilities.
Prerequisites
- You must sign up for an account with Snyk.io before you begin.
Let’s Configure Snyk Security On Jenkins Server
- Navigate to the Manage Jenkins > Manage Plugins area of Jenkins to install the Snyk Security plugin for Jenkins. See the Jenkins documentation for more details.

So Snyk Security plugin was installed but we need to add configuration after that we will start using that in our pipeline.
- Let’s Navigate to Manage Jenkins > Global Tool Configuration and click Snyk installations.

Name: Enter a unique name.
Install automatically: default is selected. Ensure Install automatically is selected.
- This ensures your plugin automatically upgrades when there are newer versions available.
Click on Add Installer > Select Install with snyk.io.
From the Install with snyk.io section enter values for these fields:
- Version: The plugin version you would like to install; we recommend leaving the default latest to stay up-to-date with our Snyk CLI changes.
- Update policy interval (hours) — this is a Jenkins parameter by which Jenkins checks the version of the installed plugin based on the value of this parameter and the frequency of your builds, updating the installation as necessary as part of the Snyk security task step if no other builds have triggered update checks already for that installation during that time interval. We recommend a policy of 24-hour intervals.
- Save the changes.
Now Snyk Security plugin was configured on our Jenkins server but we don’t have the API token of Snyk.
Get API token From Snyk
For API token We need to Navigate to Snyk > Login or Signup.
From your Snyk account, navigate to Settings > General.
If you are a member of an organization, copy the Organization API key
If yours is a personal account, then copy the Personal access token.

Now we have our Snyk API token Let’s move to the Jenkins server and save that as a Credentials and use that in the out pipeline.
- From the Credentials area in Jenkins, enter your Snyk API token to enable Snyk to communicate with Jenkins, accessing your project, scanning, and monitoring it.
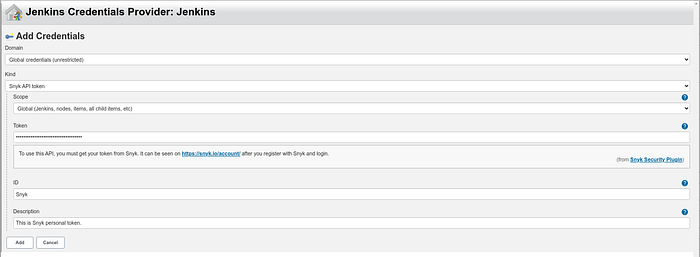
- Use these values:
Kind: Select Snyk API token.
Scope: Select Global.
Token: Enter the Snyk API token that we copied from the Snyk account.
ID: Enter a name for the token.
Description: Enter the Description for the token.
For more information about global credentials, see the Jenkins documentation.
🎊 🎉🤖🎊 🎉 Congratulations… Snyk is configured on our Jenkins server.
Let’s create our first pipeline with Snyk
We have already discussed the Jenkins pipeline project and how can we create a pipeline project in the following article so if you are not aware of the Jenkins pipeline please go through this
For any pipeline project, you can add a Snyk step to your build at any point in your pipeline, to scan the code while you build and to fail the build for vulnerabilities, based on your configurations. Simply generate a Snyk Security task pipe and add it to your Jenkinsfile to get started.
- From within Jenkins, generate a Snyk Security pipeline syntax:
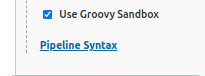
- Navigate to the pipeline project you would like to test, and click Pipeline Syntax.
- From the Sample Step dropdown, select any security: Invoke Snyk Security task.
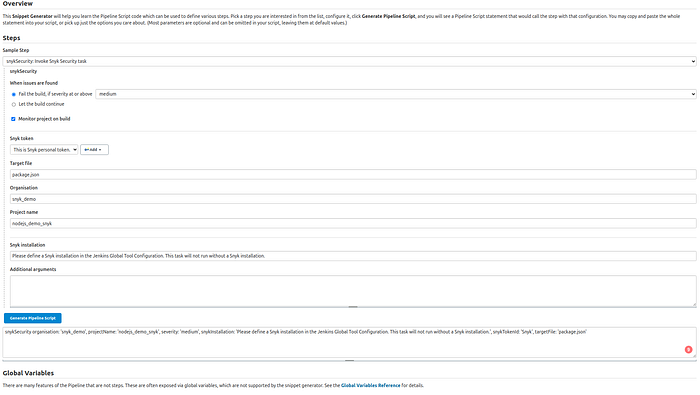
Configure the security task as follows:
When Issues are found:
- Fail the build, if severity is at or above: Fails the build when a single vulnerability of the severity level selected from the drop-down is identified in the project.
- Let the build continue: Display vulnerabilities and details, but allow the build to continue.
- Monitor project on build: Push a snapshot of the project to the Snyk UI. Snyk then continues to monitor your project for newly disclosed vulnerabilities.
- Snyk token: Select the token that you already created from the Jenkins Credentials area.
- Target file: Indicate the path to the manifest file; if the file is in the root folder, leave it blank.
- Organization: The Snyk organization to which this project should be associated.
- Project Name: Enter a unique name by which to identify this project from the Snyk UI. If left blank, Snyk assigns a project name based on the manifest file data.
- From the Advanced area, leave the Snyk installation default. Enter any additional valid Snyk CLI arguments and their values in the Arguments box.
- Click Generate Pipeline Script. The pipe syntax is generated and displayed in the above image.
2. Copy the generated pipeline syntax.
3. Navigate to the Configure area of your pipeline and go to the Pipeline part. Paste the Snyk step syntax in your pipeline as part of an existing stage or as a new separate stage.
node {
    stage('Preparation') {
        git '<GITHUB REPO URL>'
    }
    stage('install'){
        sh 'npm install' // Dependency Installation stage
    }
    stage('Scan') {
        snykSecurity organisation: 'prashant.b', projectName: 'nodejs_demo_snyk', severity: 'medium', snykInstallation: 'Snyk', snykTokenId: '87cd2da3-ccfa-46f7-b7d4-d115b400422c', targetFile: 'package.json'
    }
    stage('Build') {
        echo "Build"
    }
    stage('Results') {
        echo "Test Result"
    }
}
🎊 🎉🤖🎊 🎉 Our pipeline was successfully configured.
Click on Build Now.
Now, you can watch the progress in Console Output. If we have any venerability in the given project it will fail and display console output like the following screenshots.
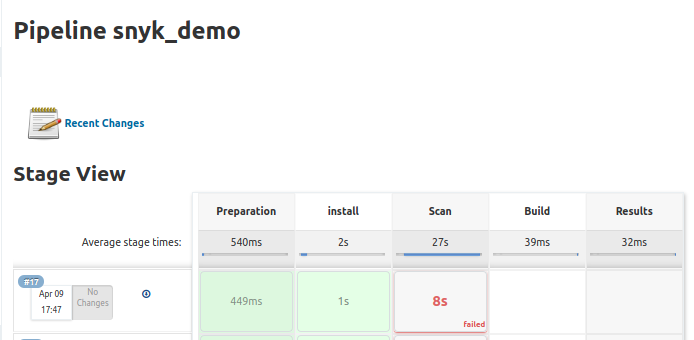
Here we have a Pipeline Dashboard screenshot that displays our pipeline failed on the Scan stage as we have added Snyk security scan in the Scan stage Snyk security scans our project package and Snyk found some venerability that’swhy it will scan on the Scan stage.
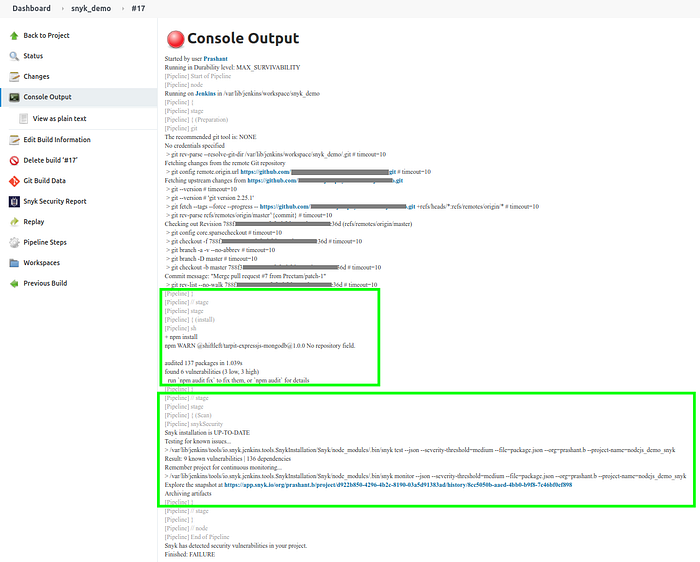
here are the console output logs that display pipeline execution logs.
Now Let’s navigate to the Snyk Dashboard > Project tab.
It will display the project with the project name which we give in the Jenkins pipeline inside the Snyk security plugin configuration block.
snykSecurity organisation: 'prashant.b', projectName: 'nodejs_demo_snyk', severity: 'medium', snykInstallation: 'Snyk', snykTokenId: 'ID-TOKEN', targetFile: 'package.json'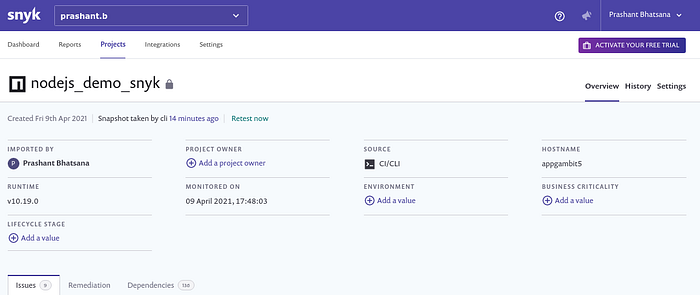
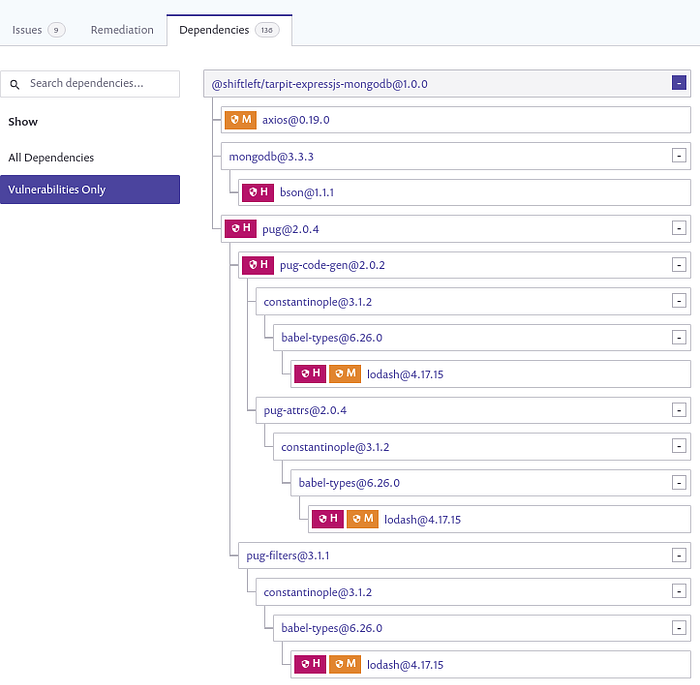
Once all vulnerability is fixed it will pass out Scan after that it will move to the next step and successfully run our Jenkins pipeline.
So that’s it We configured Snyk vulnerability scan security for our NodeJS application build pipeline.
Thank you for reading, if you have anything to add please send a response or add a note!

